


DIY Natural Ink with Black Tea
I’ve been having a lot of fun using natural inks on my business cards and product tags and thought I ought to share how I do it with you! In this tutorial, I’m using black tea, as I wanted to use something that would be easily available but still produce good results. Black tea is high in tannin, which means the results would last longer and as a common kitchen waste it’s very safe and practically free (especially if you’re a tea drinker or live with one)!

Collecting & Gathering
You can use both fresh tea bags and leaves or collect ones you’ve already made tea to drink from for this project. If you’re collecting used tea bags and not using them immediately, you can either dry or freeze them to prevent mould growth until you’re ready to make your ink. I like to pop them into the oven on low (you can do it after a bake is done or while it’s preheating) to help them dry out quicker. Once they’re dry you can store them in a paper bag or open jar till you have enough!

Now, let’s make ink!
1. In a pot, put in the tea bags or leaves and add enough water to cover. I like to fill it up to 2cm above the bags at this stage and then cook it down later in the process.
2. Bring your pot up to a low boil, and then turn the heat down to let it simmer for about 30 - 60mins. Just like making a thick brew of tea, as it heats up, you’ll notice the pigment slowly leach into the water and transform its colour. Be careful to check on the water level every now and then, topping up when necessary, so you don’t burn the pot!
3. Once the tea is adequately coloured, turn the heat off and let it sit and cool overnight. The colour will continue to develop during this time as the tea leaves soak. You can also try decanting some at this stage, while letting the rest sit for longer to see which you like most.
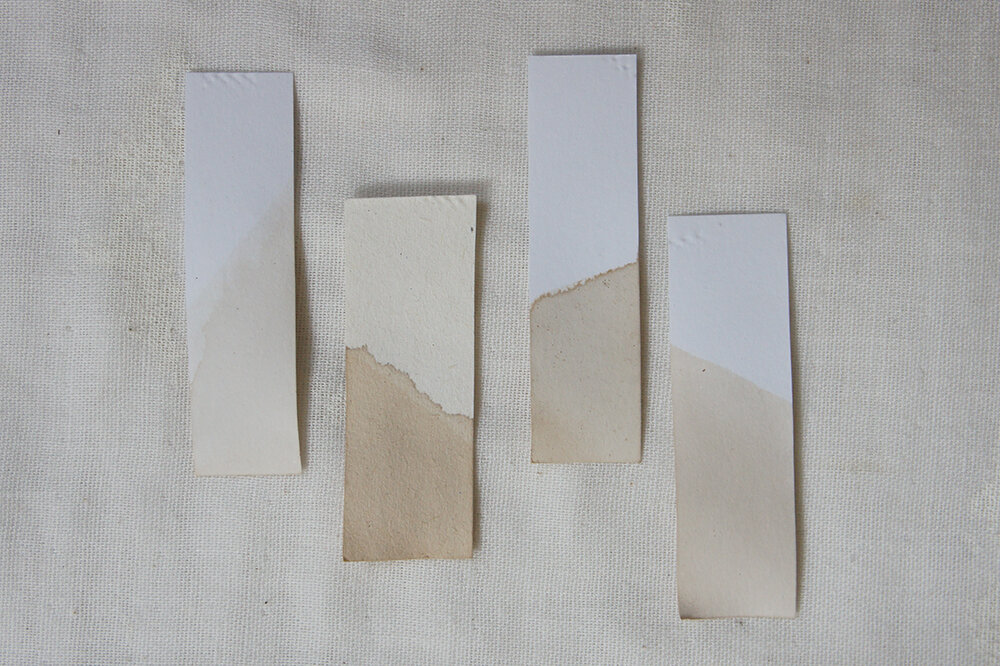
4. The next day, check the colour of your ink (you can do this by dipping strips of paper) to see if you’re happy with it. You can reheat and let cool again as many times as you like, checking the colour each time till you’re happy with it. Feel free to add more water if you feel there is a need to.
5. Once your desired colour has been achieved, it’s time to strain it. Give your pot a swirl and see if you can spot any sediment or loose tea leaves in your ink. If there isn’t, a sieve or colander lined with muslin or cheesecloth would probably be enough, otherwise, a funnel lined a with coffee filter will catch the fine bits. Set your straining or filtering set up over a clean glass jar, and carefully pour your ink through. I like to use my spoon to press down on the tea bags to make sure I get every last drop. This can be a slow process, especially if your ink has a lot of fine particles. But be patient and you’ll be rewarded with a beautiful, clear liquid afterwards.
6. After straining, I like to return the initial extraction to a clean pot and cook over low heat into a concentrate. This reduces the storage space you’ll need and will also allow you to achieve a wide range of shades quickly - just thin it down with water during use. Think of this as your stock cube or cordial! Again, watch your pot closely as you don’t want to burn all your hard work! Once reduced to your liking, let it cool before decanting into a clean glass jar or bottle.

7. Your ink is now ready to use! Grab a couple of brushes and sheets of paper and get creative! Paint with it like watercolour paints, use it for lettering, drop large drops onto paper and blow with a straw to create organic lines. My personal favourite is to dip large brush or even just a wooden spoon and splash! To store for later, you can add a couple of drops of clove oil (or add one or 2 whole clove buds) to the ink to help prevent mould. Choosing a jar of the right size and filling it up to the brim to make sure there’s no air space also helps, as does refrigerating. If mould does form, very carefully scoop the top off and you can use the rest!
8. You can also add some Gum Arabic to thicken the ink for a more controlled flow. Just like making a white sauce, I find that adding the liquid to the dry Gum Arabic a little at a time works the best. Add a little Gum Arabic to a clean, heatproof vessel and add a little bit warmed (not boiling) ink to it and stir thoroughly. You want to first wet out all the Gum Arabic to make a thick paste first and then slowly increase the amount of ink you introduce each time. This will help to prevent lumps and ensure an even consistency. Depending on how much Gum Arabic you use, you might find that the ink will dry up a little glossy.

9. If you have some homemade iron modifier, you can add that to a portion of your final ink to make a second colour too! The tannin will react with the iron to create a warm grey to black, depending on how much iron you use and also how concentrated your black tea ink is. Alternatively, you can also add a few rusty pieces (like nails, bolts or screws) into the pot while cooking the ink to get similar results. This reaction is irreversible, so do set aside some of the original ink if you want 2 colours!
Now that you have learnt the basics of making ink, you can apply the same steps to create your very own natural ink palette! Start with kitchen waste or your garden, avocado skins and stones give lovely peach, coral and pink tones while brown onion and pomegranate skins are fab for a luscious golden yellow. Be sure to check every plant you use for toxicity though, and if you don’t know it, it’s better to be safe and not use it!

I hope you’ve enjoyed the tutorial. If you do give it a go, I’d love to see your results, so give me a shout and tag me on your Instagram or Facebook posts!

Pin & Share
and help spread the word if you’ve enjoyed this post!


